Some of you will remember the ABCD photograph competition I ran some time ago. It is time to have another competition, but this time even bigger and better!
The new competition is for motorcycle videos. They can be filmed from on-board a motorcycle, they can be about anything to do with motorcycles, they can be old or they can be new.
The last competition had a short time-frame, but this one doesn’t. You have until 31st October 2013 to enter your video, so there is plenty of time. There are three categories...
1. On-board motorcycle videos. Amateur videos that include a considerable amount of material shot from on-board cameras mounted on your bike, helmet etc. 2. General motorcycle videos. Amateur videos about any aspect of motorcycles or motorcycling. 3. Professional motorcycle videos. These are made by professional film makers or videographers.
Wooley has already pointed out that entering this competition means that you have to already have a video camera, in order to win a video camera. He of course is quite right, but look at it this way – it is a chance to win ANOTHER video camera.
So, if you have a video you are already proud of, you can submit it now. If you haven’t, then start planning now to film something brilliant!
Please feel free to re-post this on your own blog, or website.
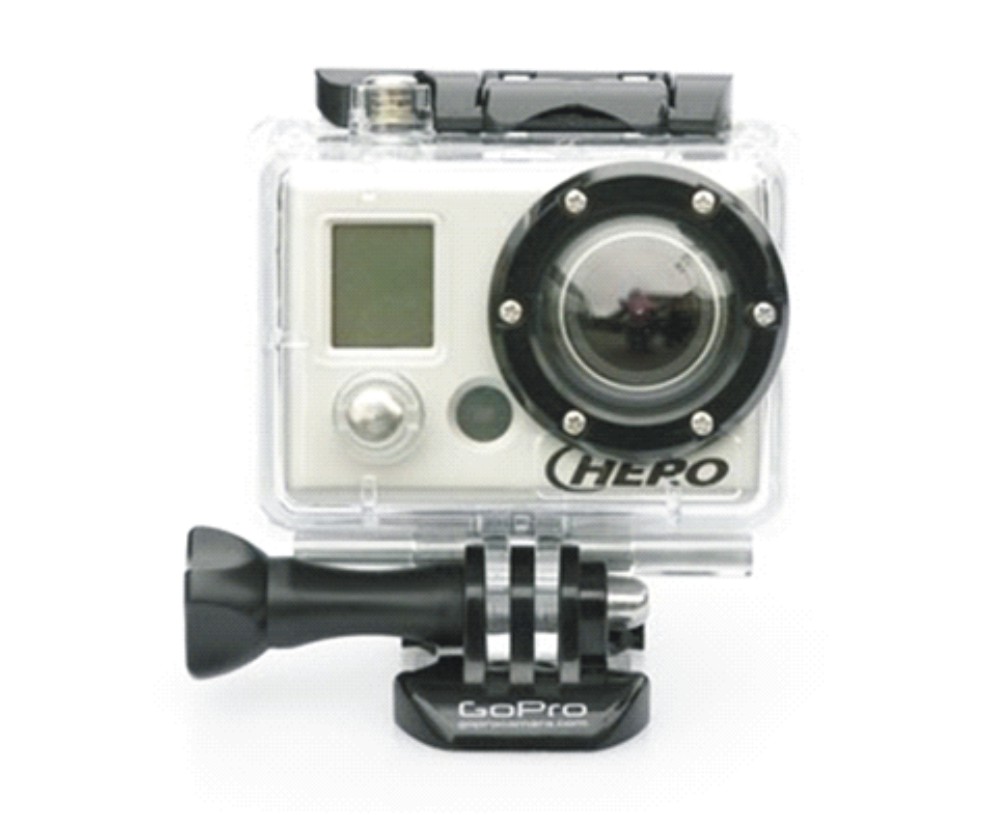
In order to write this guide, I based it upon my experience of mounting a GoPro camera to my motorbikes. Whilst I have written specifically about mounting this make of camera, I have tried to keep it as generic as possible so that it could apply to almost any camera on any motorbike. I hope you find it useful.
The guide is quite long. You could go get a drink before reading it and then settle down comfortably to read it, or you could scroll down quickly mainly looking at the pictures, or you could go down to near the bottom, to see what I recommend!
I adore my GoPro camera. It is small, very flexible, not too expensive, has great sound (no wind noise on a bike) and most of all, produces fantastic quality videos. I cannot speak highly enough of it. But, I soon realised that how you mount a camera to your motorbike is very important to the end result quality of your videos. I have tried a number of different methods with varying success, so I thought I would pass on what I have learnt.
For those of you contemplating the purchase of a GoPro camera, or indeed and camera to use on your motorbike, or for those that have realised the standard mounts that come with a GoPro camera are not very good, I present the “Rough Guide to Camera Mounts for Motorbikes”.
Not that I am an expert, neither have I tried every possible mounting system, but I have tried a few and I now realise how to tell the good, the bad and the ugly apart. Having now tried mounts that range in price from the really cheap to the expensive, I now have a definite favourite mount and there are some I will continue to use and others that are consigned to the “no way” box in my garage.
I have written here about all of the mounts I have tried and having read what others have said about different mounts they have tried, I have been able to give a score to each of the different mounts. At the end of this post, I have included my scoring sheet which presents my views numerically. With a maximum number of points of 35 being available, I have assessed each mount under the 7 categories of....
Ease of Mounting - how quick and easy is it to fix the mount to a motorbike? Flexibility – can you use the mount in different ways? Rigidity / Safety – how well is the mount fixed and is it safe? Build Quality – is it well made and will it last? Street Cred- it is fixed to your pride and joy, so does it look good? Cost – is it cheap or expensive and is it good value for money? End Results – how good are the end results of your video affected by the mount?
Saving the best until last, here are my views, starting with the worst.
Rather surprisingly, for a company that makes fantastic cameras, GoPro’s own handlebar mountscome in last with just 17 points. These are very well made and are very easy to mount to either handlebars or crash bars on a bike. They are very small and inconspicuous and therefore score highly on street cred, plus they are rigid in the way they are fixed. However, they can only be fixed at 90 degrees to your bars, with no sideways movement at all, which in most situations makes them totally useless on a motorbike! OK if you have straight bars, but if your bars are at any sort of an angle, they are no good at all.
GoPro’s own Handlebar mounts
With swept back bars, the camera points sideways at an angle, with no way to adjust it.
As there is no way to change the horizontal angle of the camera, the mount is useless and scores very badly because of this. In fact, this lack of flexibility is so bad, this issue alone relegates the standard GoPro handlebar mounts into last place. GoPro tell me they are going to make a fully adjustable mount, but until they do, I am afraid, they come last in my review.
In 6th place is something not for everybody. Given the lack of flexibility of the standard GoPro mounts, while I originally waited for a different solution to arrive in the post, I decided to make my own DIY mount. I went to a local photographic shop and bought the cheapest mini tripod I could find, chopped the legs off and screwed this to an un-used old sat nav clamp I had lying around. Using a GoPro tripod mount with a ¼ inch threaded hole, I was able to get this set-up to work on my handlebars.
It was very cheap and had good flexibily, but it moved in the wind if I went faster than about 40mph. It got me out of a fix while I waited for a new mount to arrive in the post, but even I admit, it wasn’t very good. People more able than me might be able to make a better job of it than I could, but there are much easier and better ways of mounting your camera!
In 5th place with 21 points is the GoPro suction mount. I have included this as you could mount any lightweight camera to it with the right ¼ inch tripod adaptor.
The best thing to say about this is it is really easy to mount and the suction cup is surprisingly secure, although you might want to consider using a way of tethering your camera to your bike in case it does come un-stuck. Clearly there are not many places you can mount this on a motorbike, but I tried the tank, the screen and even on the headlight, which on my bike has very smooth glass.
It works ok, but on a bike it looks cumbersome and downright ugly. One added benefit as bobscoot showed us on his blog is that it can also be mounted inside a car on the windscreen.
Here are pictures of the suction mount on my tank and headlight....
Suction mount on tank
Suction mount on the headlight
Mounting it on the headlight may seem a bit odd, but as my GoPro has a wide angle lens, I did like the results when looking backwards at the rider, because you can see the handlebars and it gives you a great idea of what the rider is doing as you can see their hands. Check out the view looking back from the headlight on this clip....
Overall, this suction mount doesn’t score very well because of the lack of flexibility, the potential for falling off and the poor street cred, however, used for short duration fill-in shots during a longer video, the results can be quite good.
The GoPro stick on mounts come in 4th with 22 points. Personally, I don’t like these, but they have a lot of good points, including the fact they are cheap, easy to use and the build quality is good.
For me, the downsides are that I don’t like the constant changing view as the rider moves their head to check traffic, look in mirrors etc. I am also not keen that you have to stick the pads to your crash helmet! My last negative is that they are not at all flexible, because once stuck into place, they can only give one view from the helmet position. I can see however how some people like them and on his blog, RazorsEdge2112 is an example of this – he has posted some videos on his blog with a helmet mounted camera.
You can remove the camera leaving the sticky mount on the helmet, so people who ride (say) a motorbike and a bicycle could use the camera on two different helmets, with two sticky mounts.
In 3rd place we have the RAM mounts with a U-boltclamp. These scored very well with 24 points.
Chrome Ram Mount, with a U-bolt clamp fixing at the bottom, ¼ inch male thread ball connector and a GoPro tripod mount.
Here are some pictures of my camera mounted to my bike using this Ram mounts system.
Front view of the Ram mount on my handlebars
Rear view of the Ram mount on my handlebars
Until very recently, this was my main method of fixing my camera to my bike. It is nice and simple, very flexible and very rigid. The main place it is fixed is on the handlebars using the U-bolt as a wrap around fixing. The quality is very good and the parts are not very expensive. They are readily available via the internet. Numerous angles can be achieved and adjusting the camera position – up, down, sideway, forwards and backwards is very easy – just undo the large wing nut, move the camera and do it up tight again. You have to be slightly careful that you don’t scratch your handlebars and I used some electrical tape to do this by wrapping it around the bars where I then mounted the u-bot fixing.
There are only two real drawbacks I can see. First, it can only really be mounted to the handlebars and second, it takes about 10 minutes to fix the mounting bracket and you need to do this with a spanner. Not a great problem but moving the mounting bracket to gain some flexibility for different shot positions is not really practical.
However, you can ride all day with this mounting system, secure in the knowledge that it isn’t going to work loose.
Coming in at second place is the Ram Mount with C-Clamp. This has been awarded 25 points out of 35, so it is scoring pretty high in most of the seven categories.
I haven’t actually used this clamp mount myself, but my Canadian friend bobscoot has. He wrote about it on his blog Wet Coast Scootin.
The Ram C Clamp mount
bobscoots GoPro camera mounted on his bike using the Ram C clamp
The main benefit of the clamp is its flexibility – it can be fixed to just about any tube or rail on your motorbike. Used in conjunction with the same type of mount bar and ¼ inch tripod mount (as in number 3 above) your camera can be fixed in many different positions and configurations on your bike. I have also given it a good score for cost, as these C clamp arrangements are not too expensive.
The downsides are it doesn’t score very high on street cred – it is not the best looking mount and it is also slightly bulky. Bob has told me the build quality is reasonable but it would have been better for the Ram C-clamp had finer threads and perhaps more rubber between the "claws" for better "gripping" action. Perhaps electrician's tape would make it hold a bit more secure. Because of the coarse threads and the small tightening knob, you can't get a lot of torque on the screw. It would be better if the knob was larger to get a more solid grip for more holding pressure. Bob found that even if you turned the knob very tightly, the whole clamp with the camera mounted would tend to "slip" out of position. Perhaps the electrian's tape would have solved the problem.
Finally and in 1st place is a system I have recently purchased and tested. It is a combination of a Cardellini clamp and a Manfrotto head. This arrangement scored a whopping 29 out of 35 in my review.
I found out about this mount on somebody’s blog (sorry but I cannot remember who’s blog it was) when I saw a piece of film made about the clamp. It is really technology from the movie industry that has been borrowed by some people with motorbikes to mount their cameras, and I have to say, it out-performs just about every other mounting system I have seen.
From bottom the top – a Cardellini mini clamp, a Manfrotto 118 spigot adaptor, a Manfrotto 482 Micro Ball head, a GoPro tripod mount and my GoPro camera
The assembled mount
So why does this mount get the top score? I have given it 5 out of 5 in 4 categories: Ease of mounting – you just tighten the screw thread by hand and it is fixed; Flexibility – you can put it just about anywhere on your bike as the photos below demonstrate; Build Quality – it is superbly made and already incorporates neoprene pads to protect whatever you are fixing it to; End Results – the wide range of places you can mount this clamp means your end results are simply the best achievable.
It also gets good marks for street cred – it looks like a professional bit of kit mounted on your bike. I have scored it 4 out of 5 for rigidity / safety only because it is possible to and therefore you might be tempted to, mount it in potential risky places, like too close to a wheel.
The only area that I marked it down on is the cost – it is considerably more expensive than the other types of mount, but in my opinion it is worth it. If you have spent a considerable amount on a camera, why wouldn’t you spend a bit more than the other options to get fantastic results?
I have included here pictures of some of the mounting options that I found on my red bike. Bearing in mind there are far fewer places to fix a camera mount on my red bike than most other bikes, I think you will agree the flexibility this mount gives is a considerable benefit.
Camera mounted on handlebars
Camera mounted on frame downtube
Camera mounted on rear swinging arm
Camera mounted on rear number plate / rear license plate
Camera mounted on swinging arm
The results of using the camera mounted in these various and very flexible ways are amazing. The video I made of riding through London last week (copied below) was filmed using this mounting system and I am very happy with the results.
In summary, the different methods of mounting a camera are many and varied. Different systems will be better for different people – I guess it really depends what you want from your video camera and how you want to use it.
Whichever system you use, I wish you all the best with it and may it help you to produce fine videos. For those that are interested, here is my scoring sheet and you will need to click on it to read it properly. I totally accept that other people might score each system differently to me!
If you have managed to read all the way down to here, congratulations!
Friend and fellow blogger Ian Solley, of 7 Ages Custom Motorcycles and I went for a ride on our custom motorbikes on Thursday. Ian is a custom bike builder extraordinaire, as he mainly builds bikes for fun and he currently has 6 of them!
We decided to meet at 10.30am in Greenwich. Founded by King Charles II and built in 1675, the Royal Observatory at Greenwich is the home of Greenwich Mean Time and the Prime Meridian of the World, making it the official starting point for each new day, year and millennium. As time is started there, it seemed like an ideal location for Ian and myself to start our motorcycle ride.
I live just north of London but Greenwich is way over in East London. I had allowed plenty of time to get there, but I was late. London traffic is unpredictable, but predictably it all seemed to be in the same place as me. Combined with the fact that I wasn’t exactly sure where the entrance to the Observatory was and I misjudged its location badly, meant I arrived late. However, as I rode along the Observatory's tree lined avenue, there was Ian - smiling and waiting for me.
Ian had bought one of his latest bikes, called Hamlet. It is a striking light blue bike rigid-framed bike with a Harley-Davidson engine, originally from a Street Bob. It has an S&S carb and the frame and all the sheet metal are to a one-off design. The exhaust pipes are wrapped and having ridden next to it, I can personally vouch for their volume!
The picture above shows the bikes in front of a statue of General Wolfe who commanded the British forces at Quebec against the French and won a great victory, at the cost of his life. The statue was erected in 1930 and bears the inscription “This monument, a gift of the Canadian people, was unveiled by the Marquis de Montcalm”. History lesson over.
Here are some more pictures of the Royal Observatory....
The bikes on the tree-lined avenue
Part of the observatory
General Wolfe looking out over London
The bikes draw some interest
The view over London with the National Maritime Museum at the bottom of the hill and Canary Wharf in the background
The weather was unseasonably warm – it fact it was a corker of a day – slightly chilly at first but then warm with bright blue skies all day. We had a fantastic ride – no rush, no time to get anywhere, just two guys out riding their bikes. We stopped at Warrs, the Harley-Davidson dealer in Chelsea before eating at a Spanish restaurant just around the corner.
Here is a video we took of the ride .....
As you can see, we tried the camera in many different positions and this was using a new recently acquired mounting clamp. I will write more on this blog soon comparing the different types of mounting clamp available.
Ian in the restuarant
Thanks Ian for a brilliant day out, and for lunch!
You might see some more of Ian and one of his bikes on this blog in the near future – we are both going to the 2010 Harley-Davidson Euro Festival in St Tropez, southern France and no doubt I will be doing a posting or two about that trip.
The sun was out, the skies were blue, the temperature was warm. What a perfect day for a ride!
I wanted to test my GoPro camera in a city, so I chose London - My City. I was born here and have lived here all my life. So I fixed the camera to the bike, checked I had a full battery and I headed south into Central London.
I love My City. It is so lively, so full of things to do and see. So full of culture and the arts. So full of magnificent buildings. So full of life.
Yesterday, so full of traffic!!! So full of tourists!!! The latter were nice to see. The former wasn’t.
I have cut down 2 hours of film into the highlights of the ride. Squeezing London into 10 minutes isn’t easy, but I enjoyed the ride and making the video. I hope you enjoy watching it.
You will see a few things worthy of a small note....
The Amphibious Tour Bus is called The Duck. It is unlike any other bus tour in London as after driving on the streets for a while, it plunges into the River Thames!
You will see Horseguards Parade, which is a large square often used for Royal and State occasions. This is going to be the location for the Beach Volleyball in the London 2012 Olympic Games.
The London Eye is 135 metres (442 ft 11 in) in diameter and is the largest observation wheel in the world. It has become the most popular tourist attraction in the United Kingdom, visited by over three million people in one year. The construction management company I used to be a director of built the London Eye. It was quite a challenge!
At the end of the video is Tower Bridge, which I rode across. The wide angle lens of the GoPro makes it look squat. It is actually taller than it appears.
Lane splitting is legal in the UK. Just in case you were wondering.
I know there doesn’t seem like there is much traffic in the video. Believe me, there was – I simply didn’t include it in the final video!
I think the camera performed well. The only problem was I wrapped a strip of cloth around the handlebars to protect it when I fixed the camera. This has caused a “bounce” effect when I rode over bumps. A lesson learned.
When you go travelling on your bike, you want to minimise what you carry, right?
OK, maybe not the two little beauties you were thinking of!
There is never enough space in your saddlebags / bike luggage / tank-bag or rucksack. So, anything that means we can carry less stuff has got to be good. Maybe I am slow on the up-take, but I have just realised the benefits of mini USB cables. When in the USA I carry two phones with me – my UK mobile and my US cell phone. I need both, but I used to have to carry two different battery chargers with me, because the connectors are different.
I then realised that when on my 4 month bike tour I would be taking an external hard-drive which connects to my netbooks by a mini USB cable (you can see the red hard-drive and its cable in the photo below). I can connect my GoPro camera to the netbook with the same cable. It occurred to me that if I could find an adapter to connect my phones to the same USB cable, then I wouldn’t need to take my two phone chargers as well. I looked on the web and hey-presto, there are such connectors and they are tiny. I will therefore be taking these two little beauties with me. All that means I can connect my two phone, the external hard drive and the GoPro camera all with the same cable, or more likely in case I need to connect two at the same time, I will take two mini USB cables. Neat.
My big Nikon camera also connects to the netbook using the same mini USB cable to move pictures from the camera to the netbook, but I still need to take battery chargers for that Nikon and my point-and-shoot Sony camera. What I really need are cameras that ONLY need a USB cable for connecting AND charging and then I will be in minimum packing heaven!
In an earlier post I discussed the difficulties of mounting a GoPro camera to the handlebars of a motorbike using the standard GoPro mounts. The difficulty is caused because the GoPro mounts are not adjustable – they only work at 90 degrees to the handlebars. This is fine if your bars are straight and not swept back at all.
What is needed is something like this – a mount that is fully adjustable. In my earlier post I said I would raise this with GoPro and keep you updated. It’s now time for an update.
I have been corresponding with GoPro about this issue and the current need to buy 3rd party vendors mounts to overcome the problem. After some difficulty in getting them to understand the problem, they then said their developers are considering a balljoint type accessory for their products. If they do this and create such a mount, this will be good news for future buyers of the cameras. I imagine this might take some time to design, test, manufacture and bring to market, so in the meantime it looks like RAM mounts are the answer.
Last week one of my son's and I rigged up a way of fixing my newly purchased GoPro camera to my red bike. Tomorrow, on the UK Mothers Day, I am taking part in a ride to honour British Soldiers and I want to take some video of the 10,000 motorbikes that have registered and are expected to attend.
My son and I created something that would work, but if I am honest, I didn’t entirely trust to be strong enough, so I decided to buy some RAM Mounts. Using some of bobscoots guidance, I contacted GPS City in Las Vegas and ordered some parts from there as I knew you couldn’t get RAM Mounts in the UK. I was hoping that these would arrive in time and sure enough, as I had paid $74 extra to get these shipped by priority air service, they arrived on Friday morning.
As usual, packages with gadgets in usually don’t take long to be opened in this household and just a few minutes later, I was looking at the four parts I had ordered.
I had selected two different sizes of U-Bolt fixing, so that these could be fixed to either the handlebars or the second were ordered specifically for my Road King, the crash bars. I have already fixed one of these to the red bike....
I had also ordered a short RAM Arm in chrome.
And finally I had ordered a small Camera Mount Mini Plate that connects the camera to the RAM Arm.... WAIT A MINUTE, WHAT IS THIS????....
How DUMB is that? This is not a Camera Mount Mini Plate – either I ordered the wrong thing, or GPS City sent the wrong part. I checked the delivery note. I had ordered the correct part, but they had sent something completely different. Argh!! This being Friday, there was no time left to get the correct part shipped from Vegas in time for the ride on Sunday.
My wife suggested I should look for something else in the UK, but I knew it was useless. These parts are not sold in the UK, but I decided to try anyway. Sitting down in front of my laptop I started to search and what did I find within about 30 seconds – a supplier of Ram Mounts just 10 miles away from where I live!!! I know I should have listened to my wife! If GPS City were dumb for sending the wrong part, I was even DUMBER for paying a small fortune to get something delivered all that way when I could get it just down the road.
I gave Buybits a call and they were terrific, helping me select a part that would work (they didn’t have the exact part that I wanted) and it arrived in the mail at 9am the next day - on Saturday morning. Here is the camera base that was delivered....
Here is the completed set up ready for my ride tomorrow....
I hope it works tomorrow and in the next few days I will hopefully post some video of the event.
Even though the set-up is ready for tomorrow, I still feel dumber.
Further to my earlier posting below about the GoPro camera, I really should have written something about the different ways of fixing the camera to a bike. There are essentially 4 different ways of mounting a GoPro camera that us motorcyclists / bikers / scooterists / riders (take your pick) will be interested in....
- Stick-on mounts - Using the suction cup - Using handlebar or roll bar mounts - Create your own!
Looking at each one in turn......
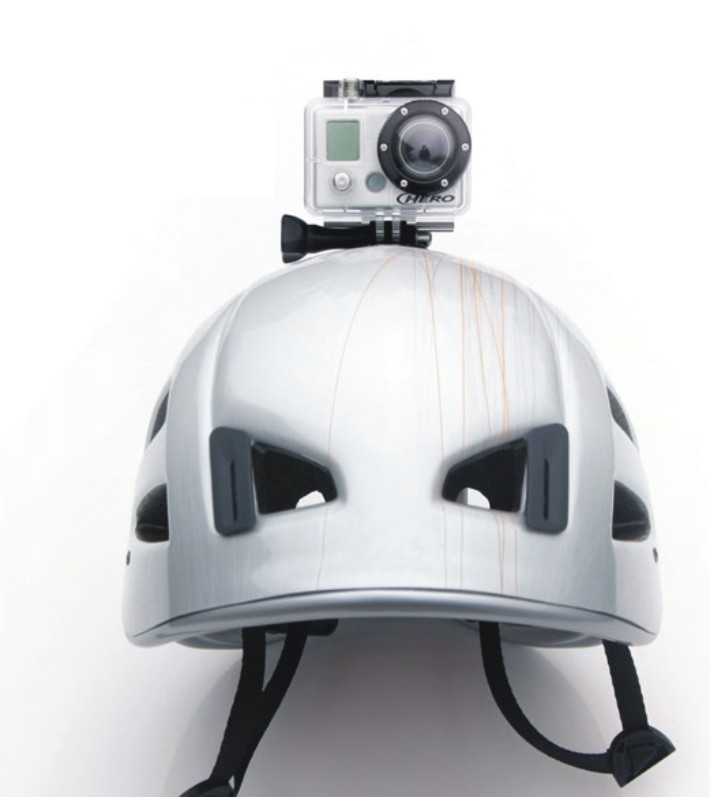
Stick-on Mounts – the version of the GoPro camera that I purchased came with a number of flat and curved stick-on mounts See this link for a picture. These could be used for sticking the camera to your helmet (this is ok on an old helmet that you don’t mind doing this to) or to somewhere on your bike (thanks, but no-thanks!). On his blog RazorsEdge2112 shows the results of mounting his GoPro camera to his helmet and whilst this gives an interesting viewpoint, when he moves his head to check traffic at junctions, the view changes a bit too dramatically for my liking. Bobscoot took the ‘sticking the mount to his scoot' route as seen on his blog. My verdict? - For me, I didn’t want to use either of these as I either personally don’t like the results or I didn’t want to damage my bike!
Using the Suction Cup - as my main touring bike is away being painted at the moment, I wanted to test the camera on my custom bike. This doesn’t have a windscreen, so there were only two ways I could mount the camera using the suction cup that comes with the camera.
The first, pictured on the left, was on the tank and yikes, I had to think about this hard because I didn’t want to do anything that might mark the paintwork. Also, I had to use just about all of the various mounting arms I had purchased in order to get the camera high enough to get a clear view over the handlebars – it did work well as the video in my earlier post shows. This is a picture of what the mounting looks like. My verdict? – being able to have the headlight and part of the handlebars in the foreground is really cool as it gives something to relate the rest of the view to. As a few people have said, watching the video makes you feel like you are right there on the bike and I think a lot of that has to do with the fact that you can see part of the bike on the shot. However, you look like a dork with this weird mounting on your tank.
Using the Suction Cup on the Headlight - this isn’t as crazy as it sounds because using the suction cup, I stuck the camera on the bike backwards pointing at me. See picture on left.
I was able to do this because the glass in my headlight is really smooth, but I imagine it wouldn’t work with ridged glass. Here is the result.....
My Verdict? – this is a really cool effect to cut into a longer video that mainly uses the camera pointing forward. Of course, the possibilities of where to mount the suction cup are many, even pointing backwards off the rear of your bike. The suction cup seemed to be achieving a strong fixing to the bike, but I would be wary of using this suction cup for really long journeys.
Handle Bar / Roll Bar Mounts - there are two different sized fixings you can buy for mounting your camera to a round bar. As I didn’t know what would fit best, I purchased the handlebar sized mount and the Roll Bar mount, where the latter is slightly bigger. This is the set-up I am likely to use for my tour of the USA with the camera either mounted to the handlebars or the crash bars of my Road King. However, there is a problem using these types of mount – they only work at 90 degree increments.
This means it is fine if your handle bars or crash bars are at exactly 90 degrees to your bike, but as there is no fine adjustment, it is a problem if for example you handlebars are swept back like this....
Create Your Own! - as this swept back bars is what I have on my red bike, I had to make something up by using the GoPro Tripod Mount, a ball & socket bar fixing and an enthusiastic son (Thanks Charles!) who helped me make this set-up.
This arrangement gives total flexibility both up and down and side to side. The video below contains the results of changing the set up to various views. This is OK, but I think I want to re-make to using something a little more substantial as I am not convinced it won’t move on a long ride due the the vibration. I am going to try it next weekend when I am going to take a long ride, so I will let you know how I get on with it.
This is the video I made from the home-made handle bar mounted camera position....
My Verdict of the Handle Bar / Roll Bar Mounts? – I was pleasantly surprised with the quality of this video as I saw a lot of vibration through the bars and thought it would affect the overall quality, but it is not too bad. This is probably the best solution for mounting to a motorbike, but GoPro need to manufacture and sell a fully adjustable mount. I am going to draw this posting to their attention to see what they say and to see if they have any plans for this. I will let you know what they say.
I am of course talking about my GoPro H-D Video Camera, which I received in the post a few days ago. The box has been sitting next to my desk for a few days now and I have had to resist the temptation to open it, because I have had too much to do.
I was still busy this morning but this afternoon I now had the time and I did the following.....
- Opened the box (as Chris said on his blog, this takes quite a long time!) - Sorted out what-was-what - Was stunned at how small the camera is - Fixed the camera to my red bike (I did have some problems with this) - Shot some test scenes riding around where I live - Lost my reading glasses from my jacket pocket while riding (bugger!) - Loaded the results onto my laptop - Installed Adobe Premiere 7 - Opened the Premiere manual, look at it for 30 seconds - Closed the Premiere manual - Looked at some training video clips on You Tube about Premiere - Loaded my clips into Premiere - Edited the video - Added a title - Created a You Tube account - Created a video that is web friendly - Uploaded the video to You Tube - Took a photo of the camera - Created this post in my blog - Worked out how to create a link to You Tube
And then finally, smiled at how easy it all was! Sometimes computers really work well. I think today was one of those times.
It was all remarkably easy. Of course I have only learnt the absolute basics and I am sure I have probably done things wrong, but over time the refinements will happen and I hope to get better at this. OK, I am no Quentin Tarantino, but give it time.
So ..... big drum roll...... here is my first video clip....
In true Oscar fashion, I would like to thank those who starred in the film, my parents, my lovely wife, my children, bobscoot for suggesting Adobe Premiere V7, my dog, and everyone else that helped me achieve a life-long ambition......


.jpg)
.jpg)


.jpg)
.jpg)
.jpg)
.jpg)
.jpg)
.jpg)
.jpg)
.jpg)
.jpg)


